- Code your finger
- Print out 3D finger
- Glue on the battery power pack, nano board and micro servo to the wooden board
- Connect the wires to the nano board, for the micro servo and flexi sensor
- Cut plastic strips to glue the finger together
- Thread fishing wire through the finger
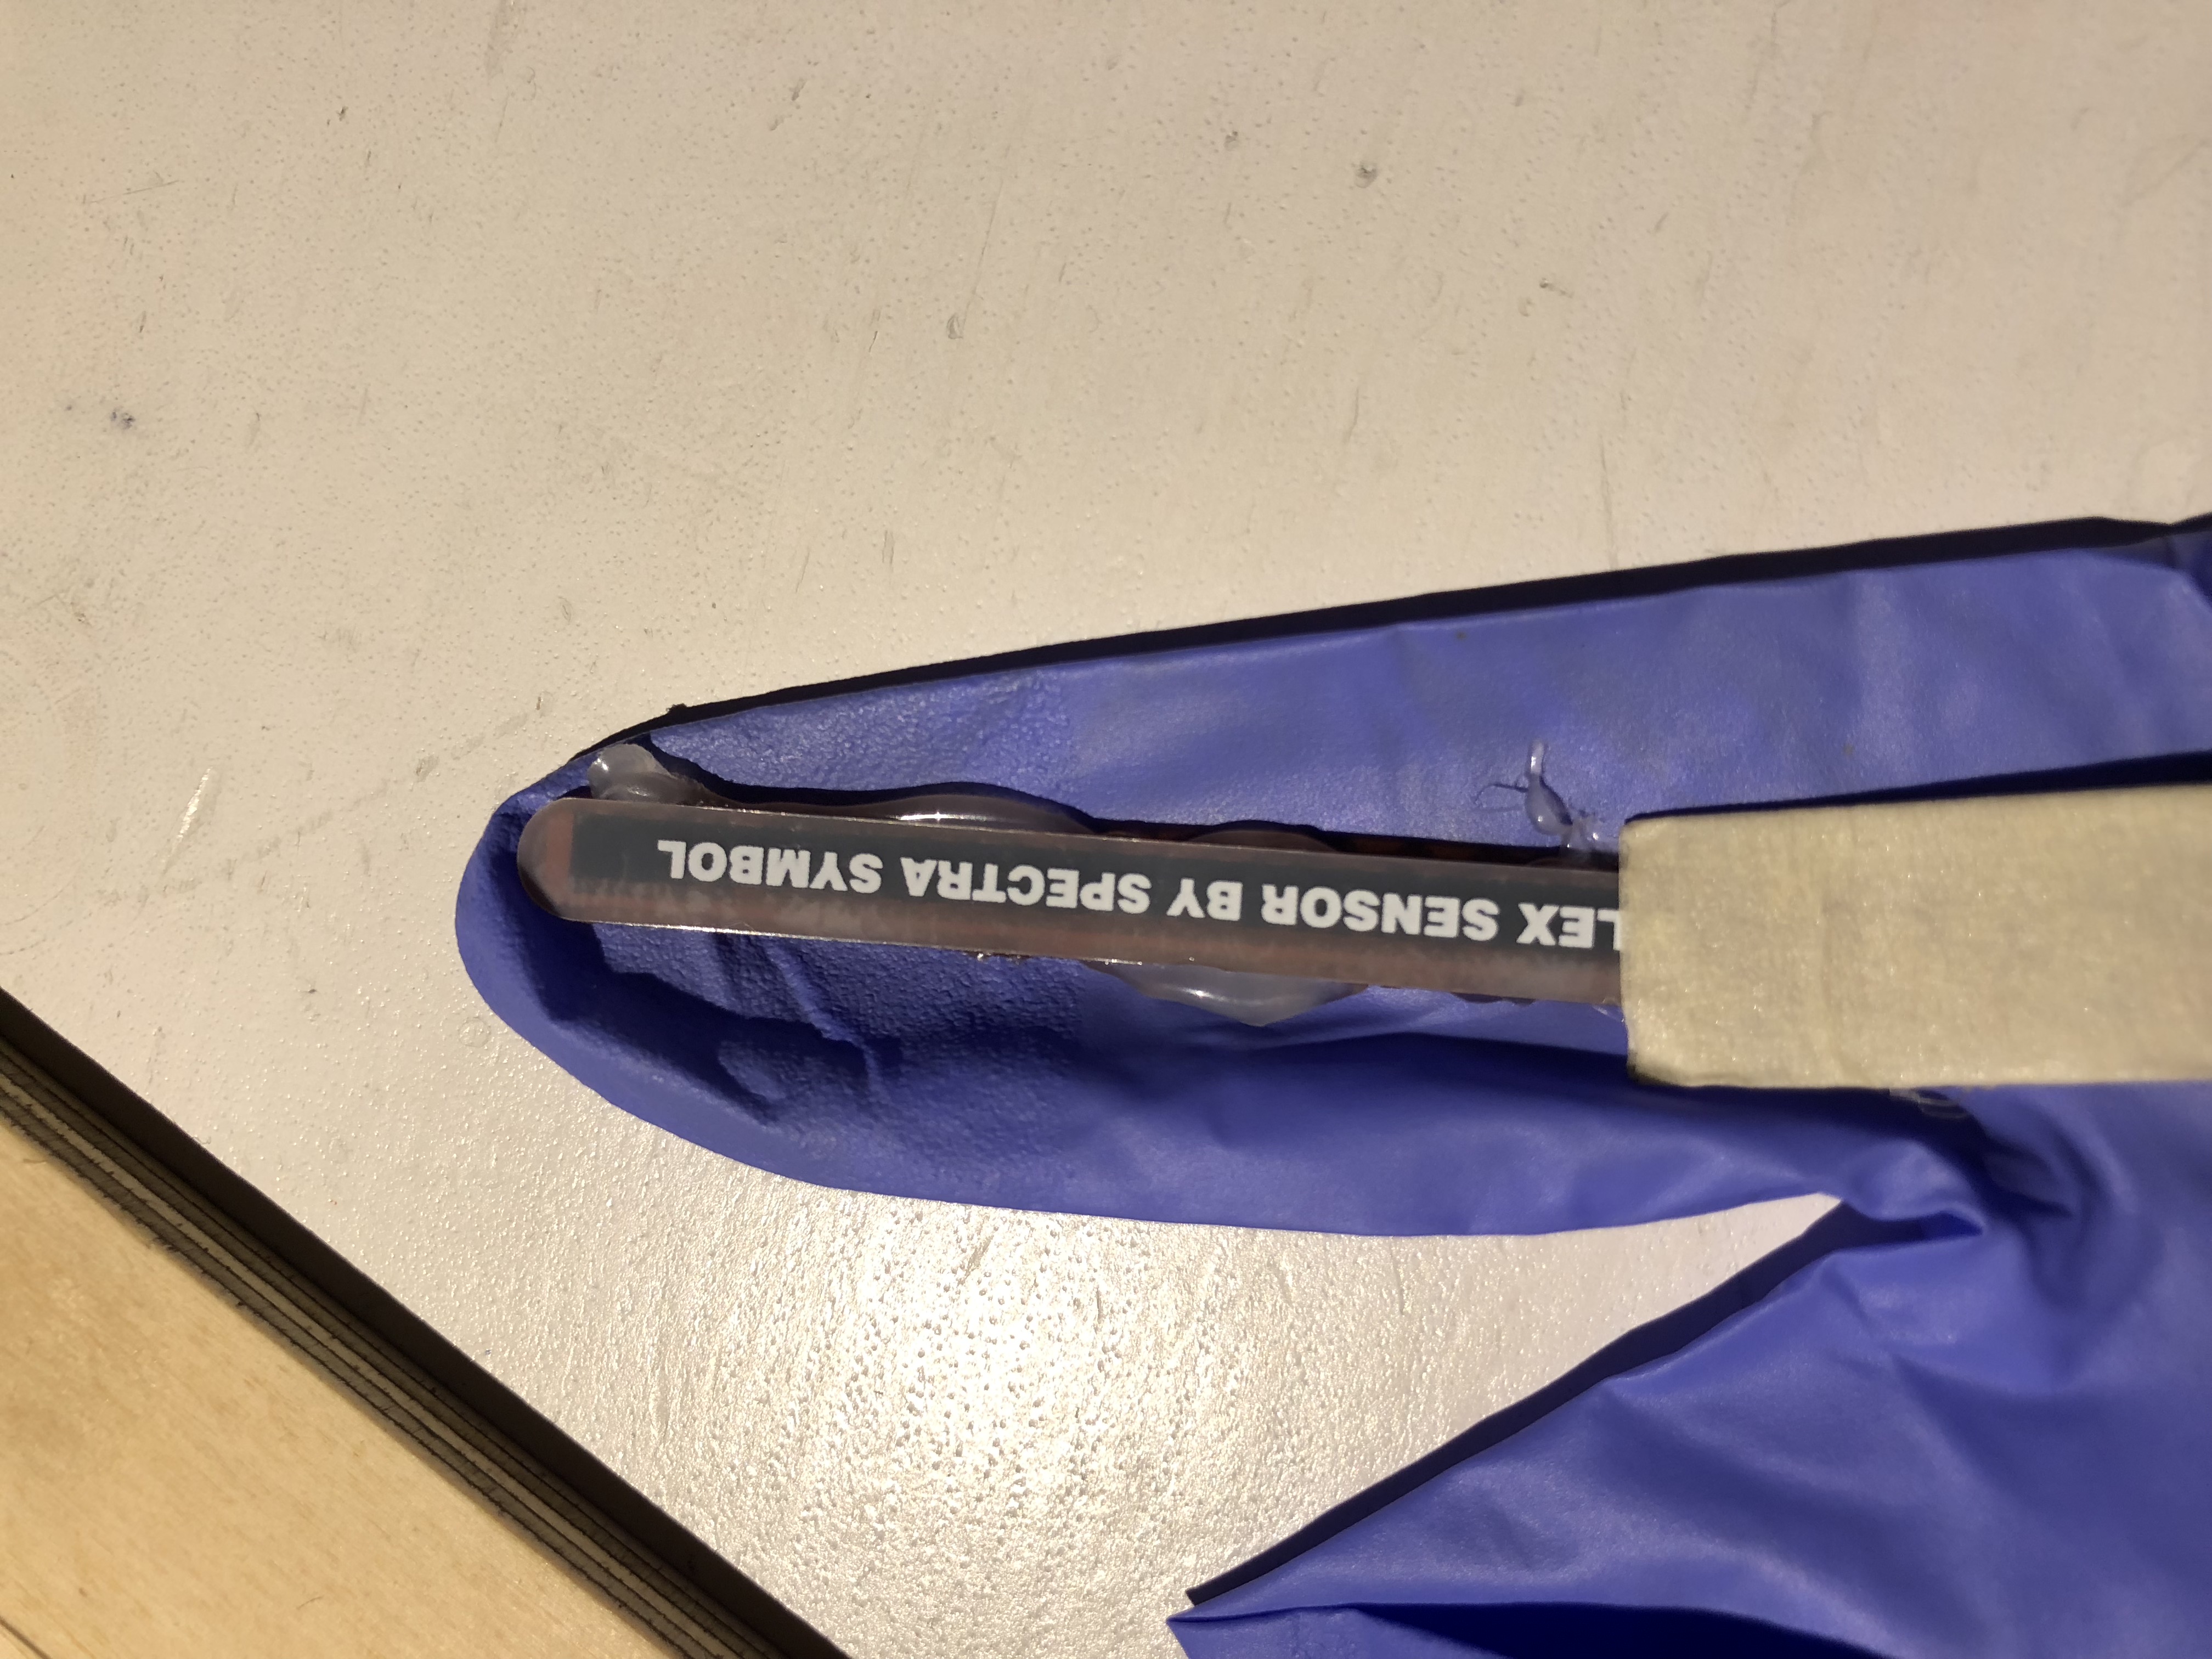
- Glue the flexi sensor onto the glove
- Upload your program
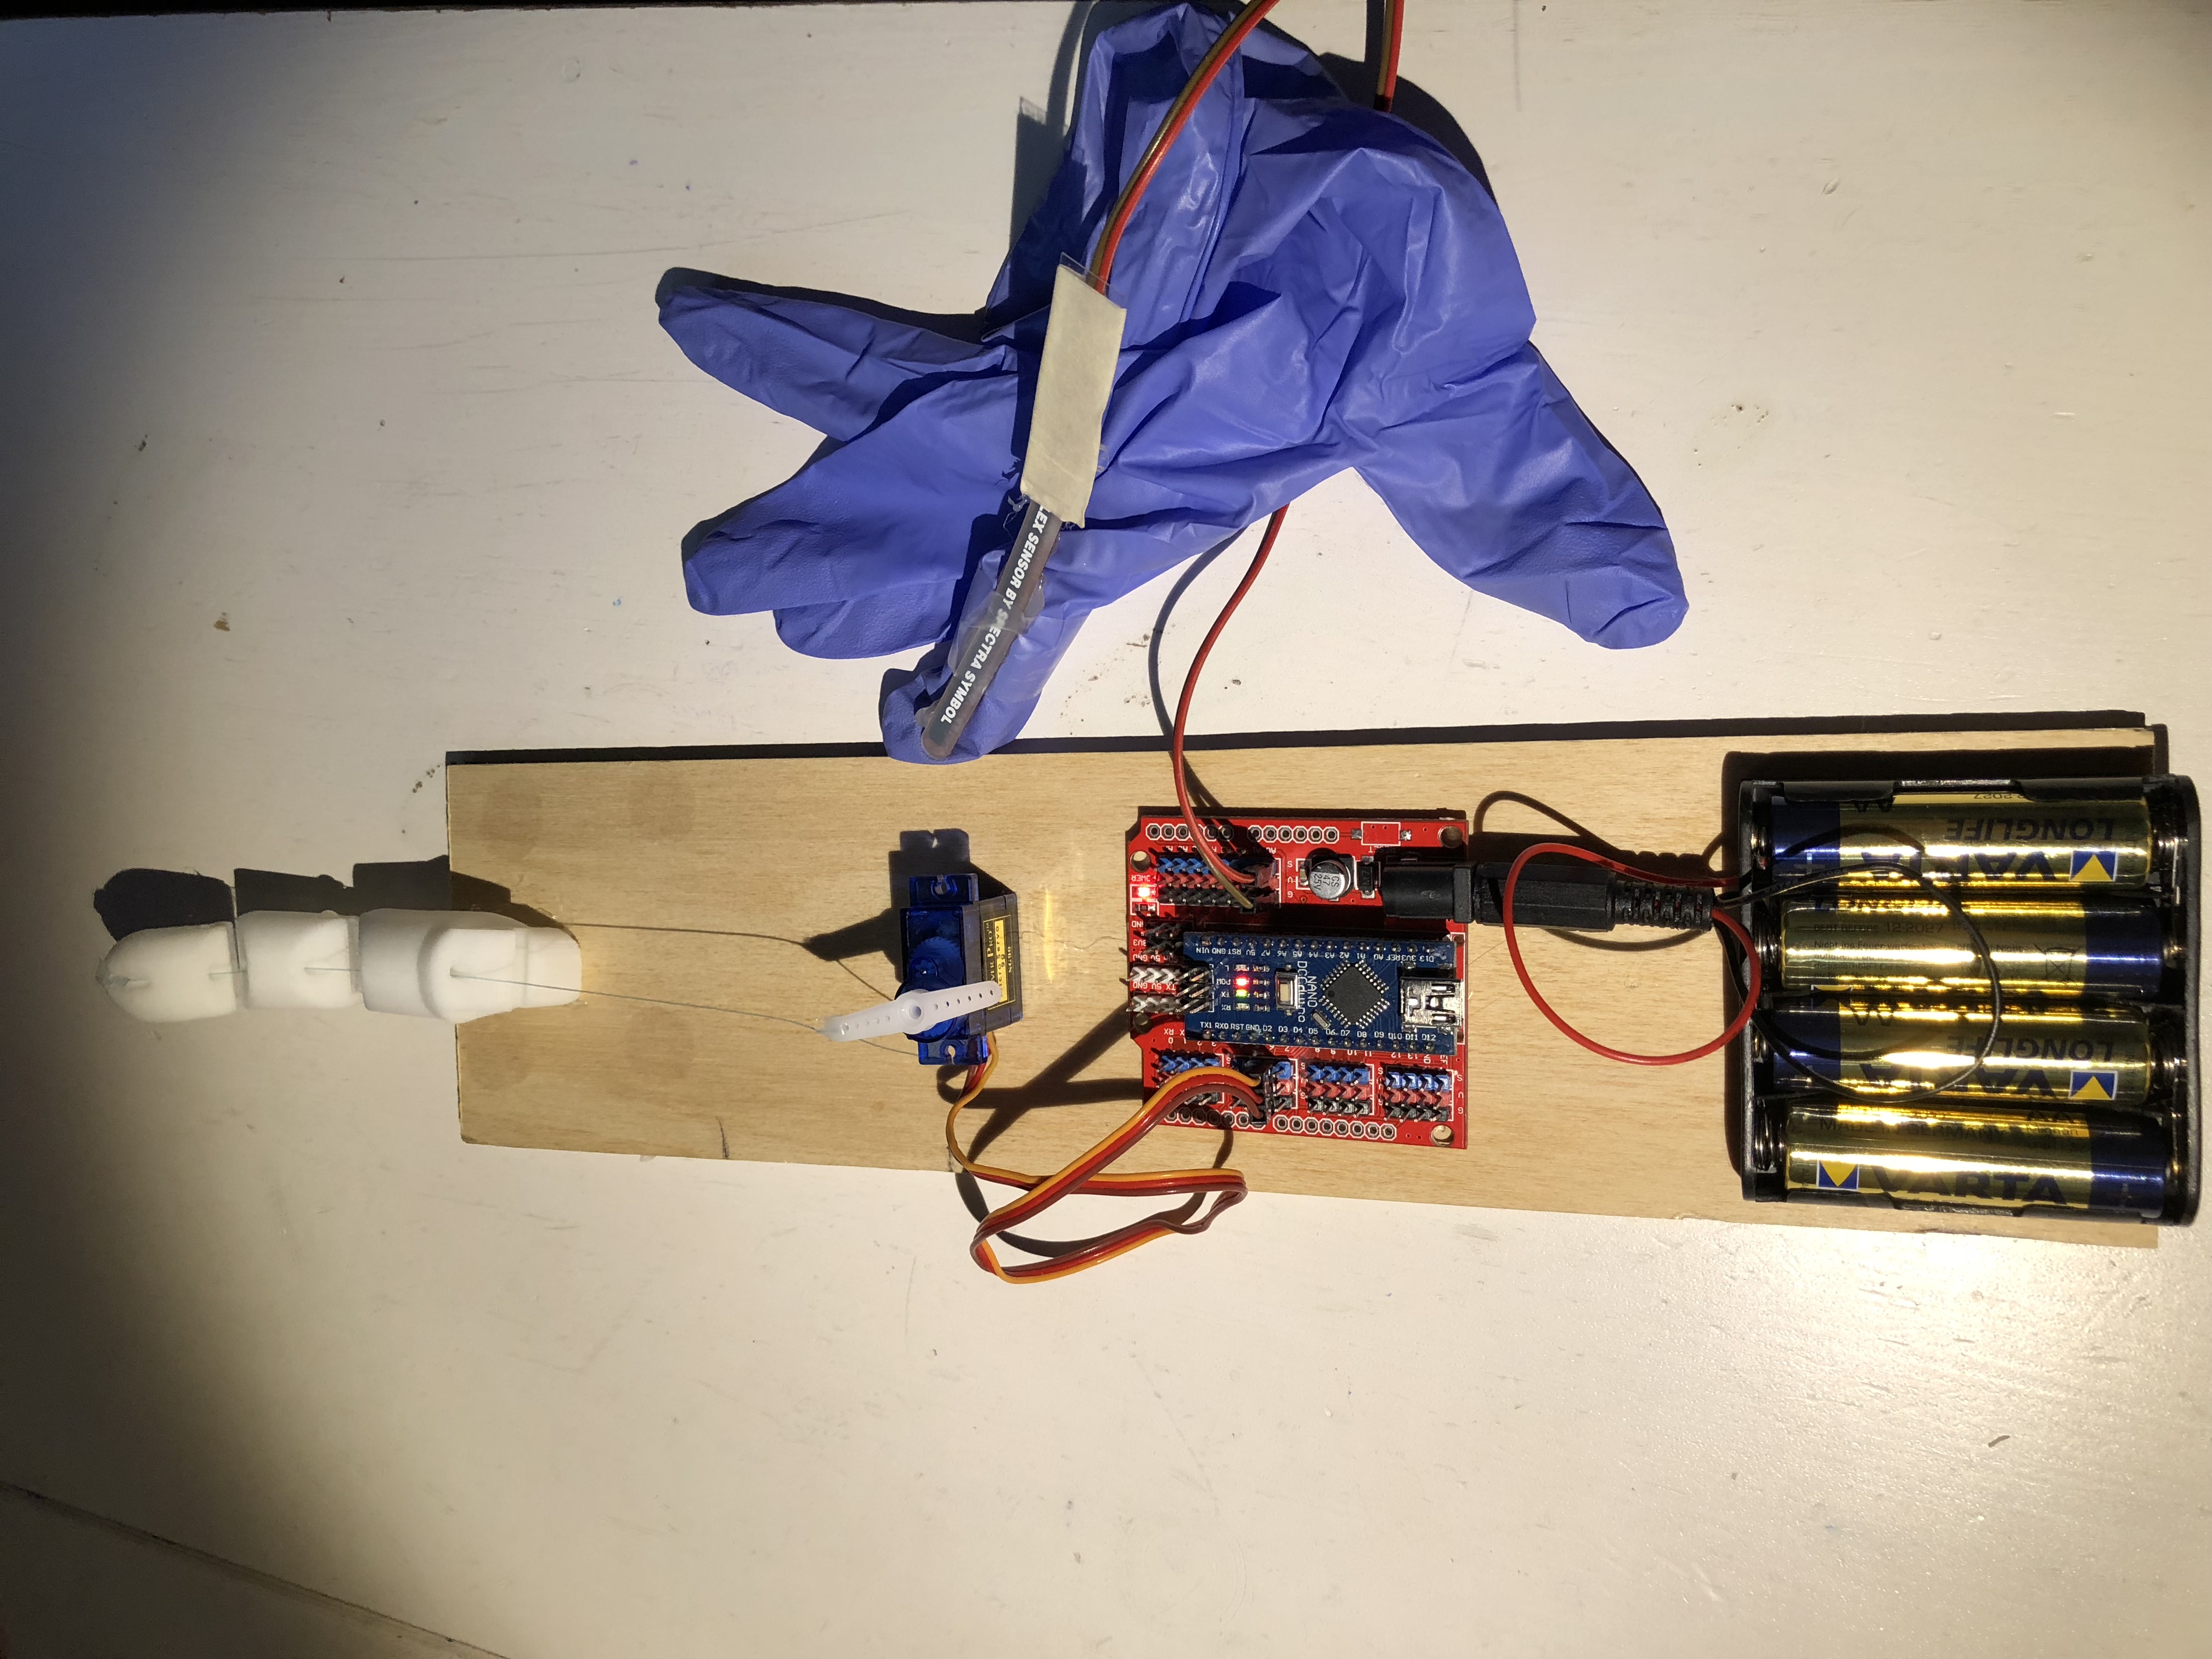
- The final product should look like this:
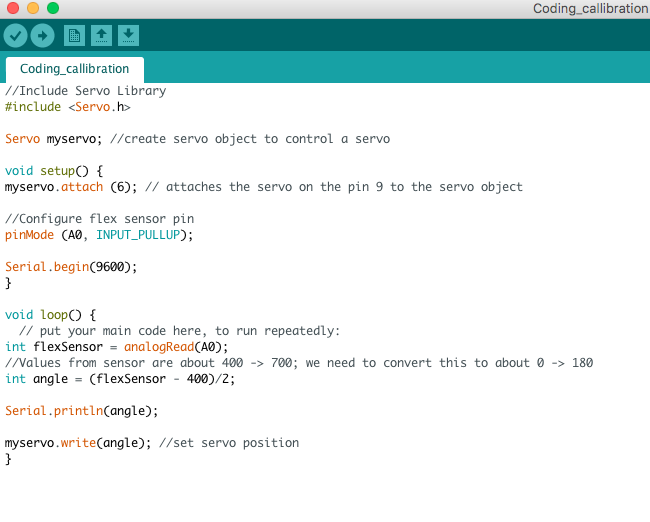
Download the Arduino application on your laptop. To make your bionic finger bend and move at the same speed and angle as your real finger, here is a video that explains the coding for you! Just follow these steps, and make sure you understand each line of code!
*You can test it out if it works by connecting the nano board to your laptop, that is also connected to the micro servo and flexi sensor with wires and uploading your program. If it works properly then the micro servo should turn when the flexi sensor is bent.
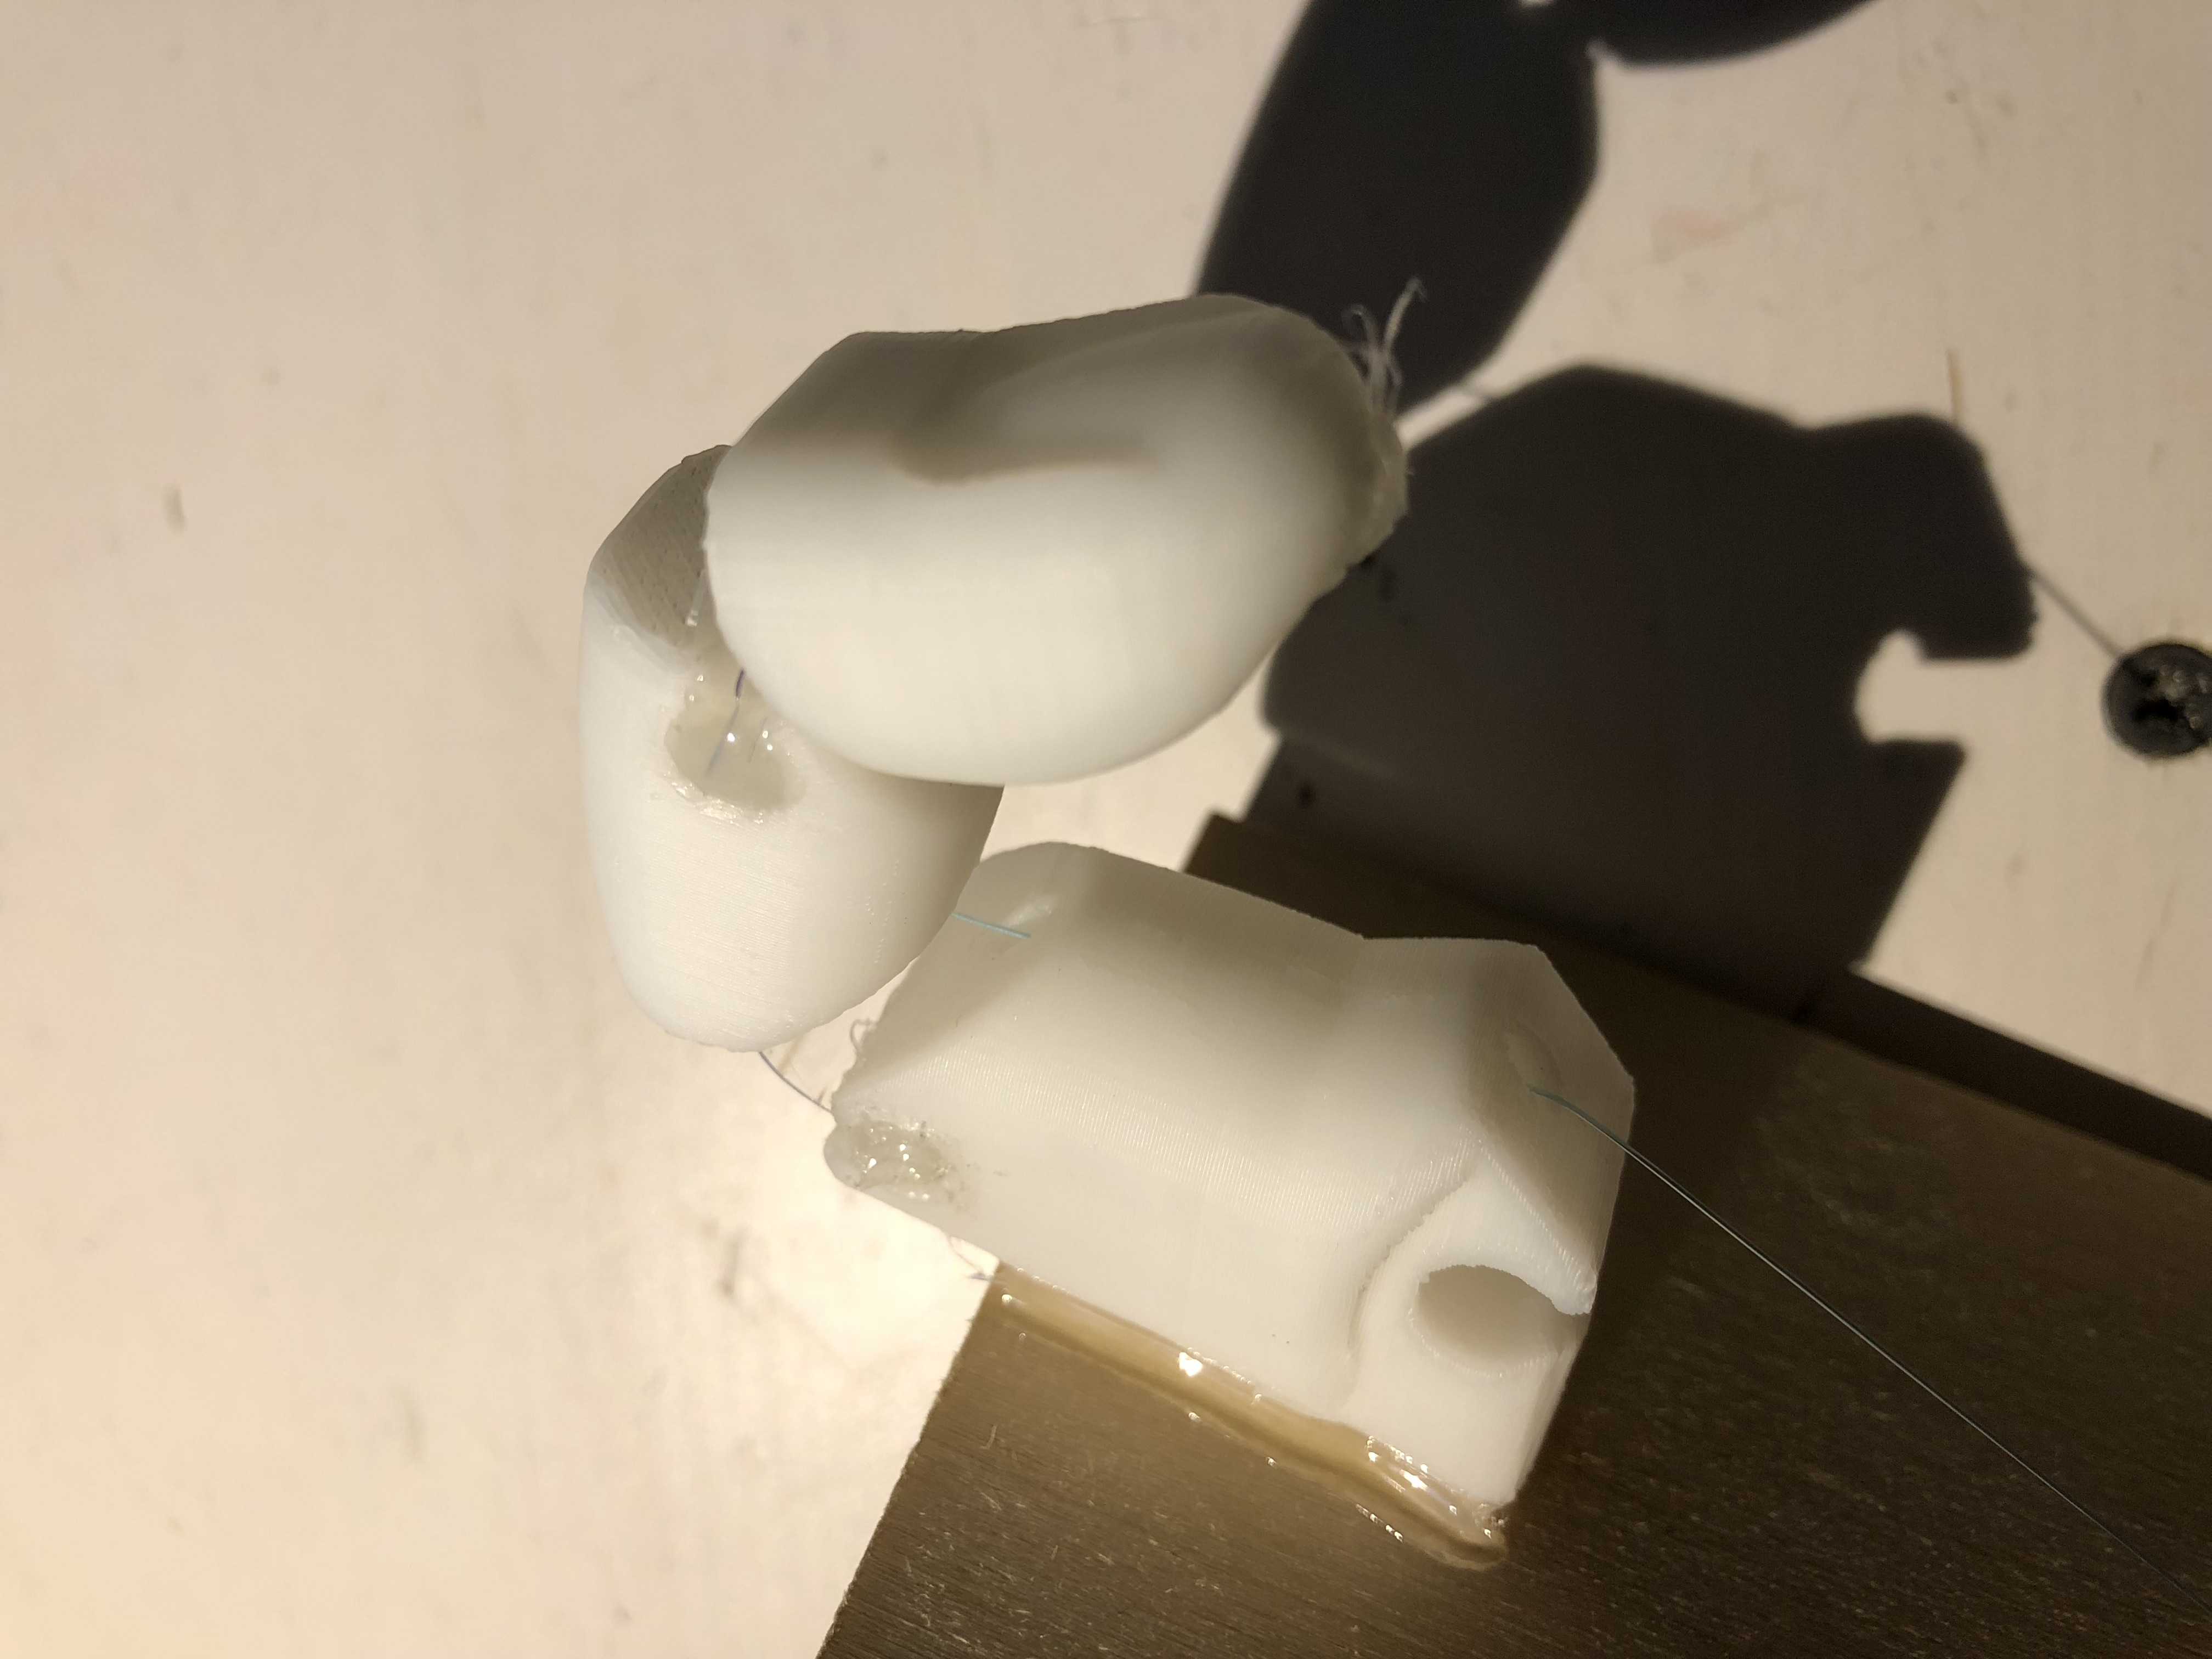
Download or make your 3D finger and print it out. Make sure they are separate joints (3) and they have a slot for you to glue the plastic strip at each end of the finger joint, so the plastic strips connect the joints together. Also make sure you have a hole that tunnels through each joint, so you can thread through the fishing wire. This is when the servo turns, the fishing wire is pulled, so it bends the finger. (Check step 5 and 6 to get a better idea).
But make sure when you glue the nano board that you do not glue any of the soldered metal parts, so glue in the middle of the board. Look at this picture for an example of how they should all be placed like:
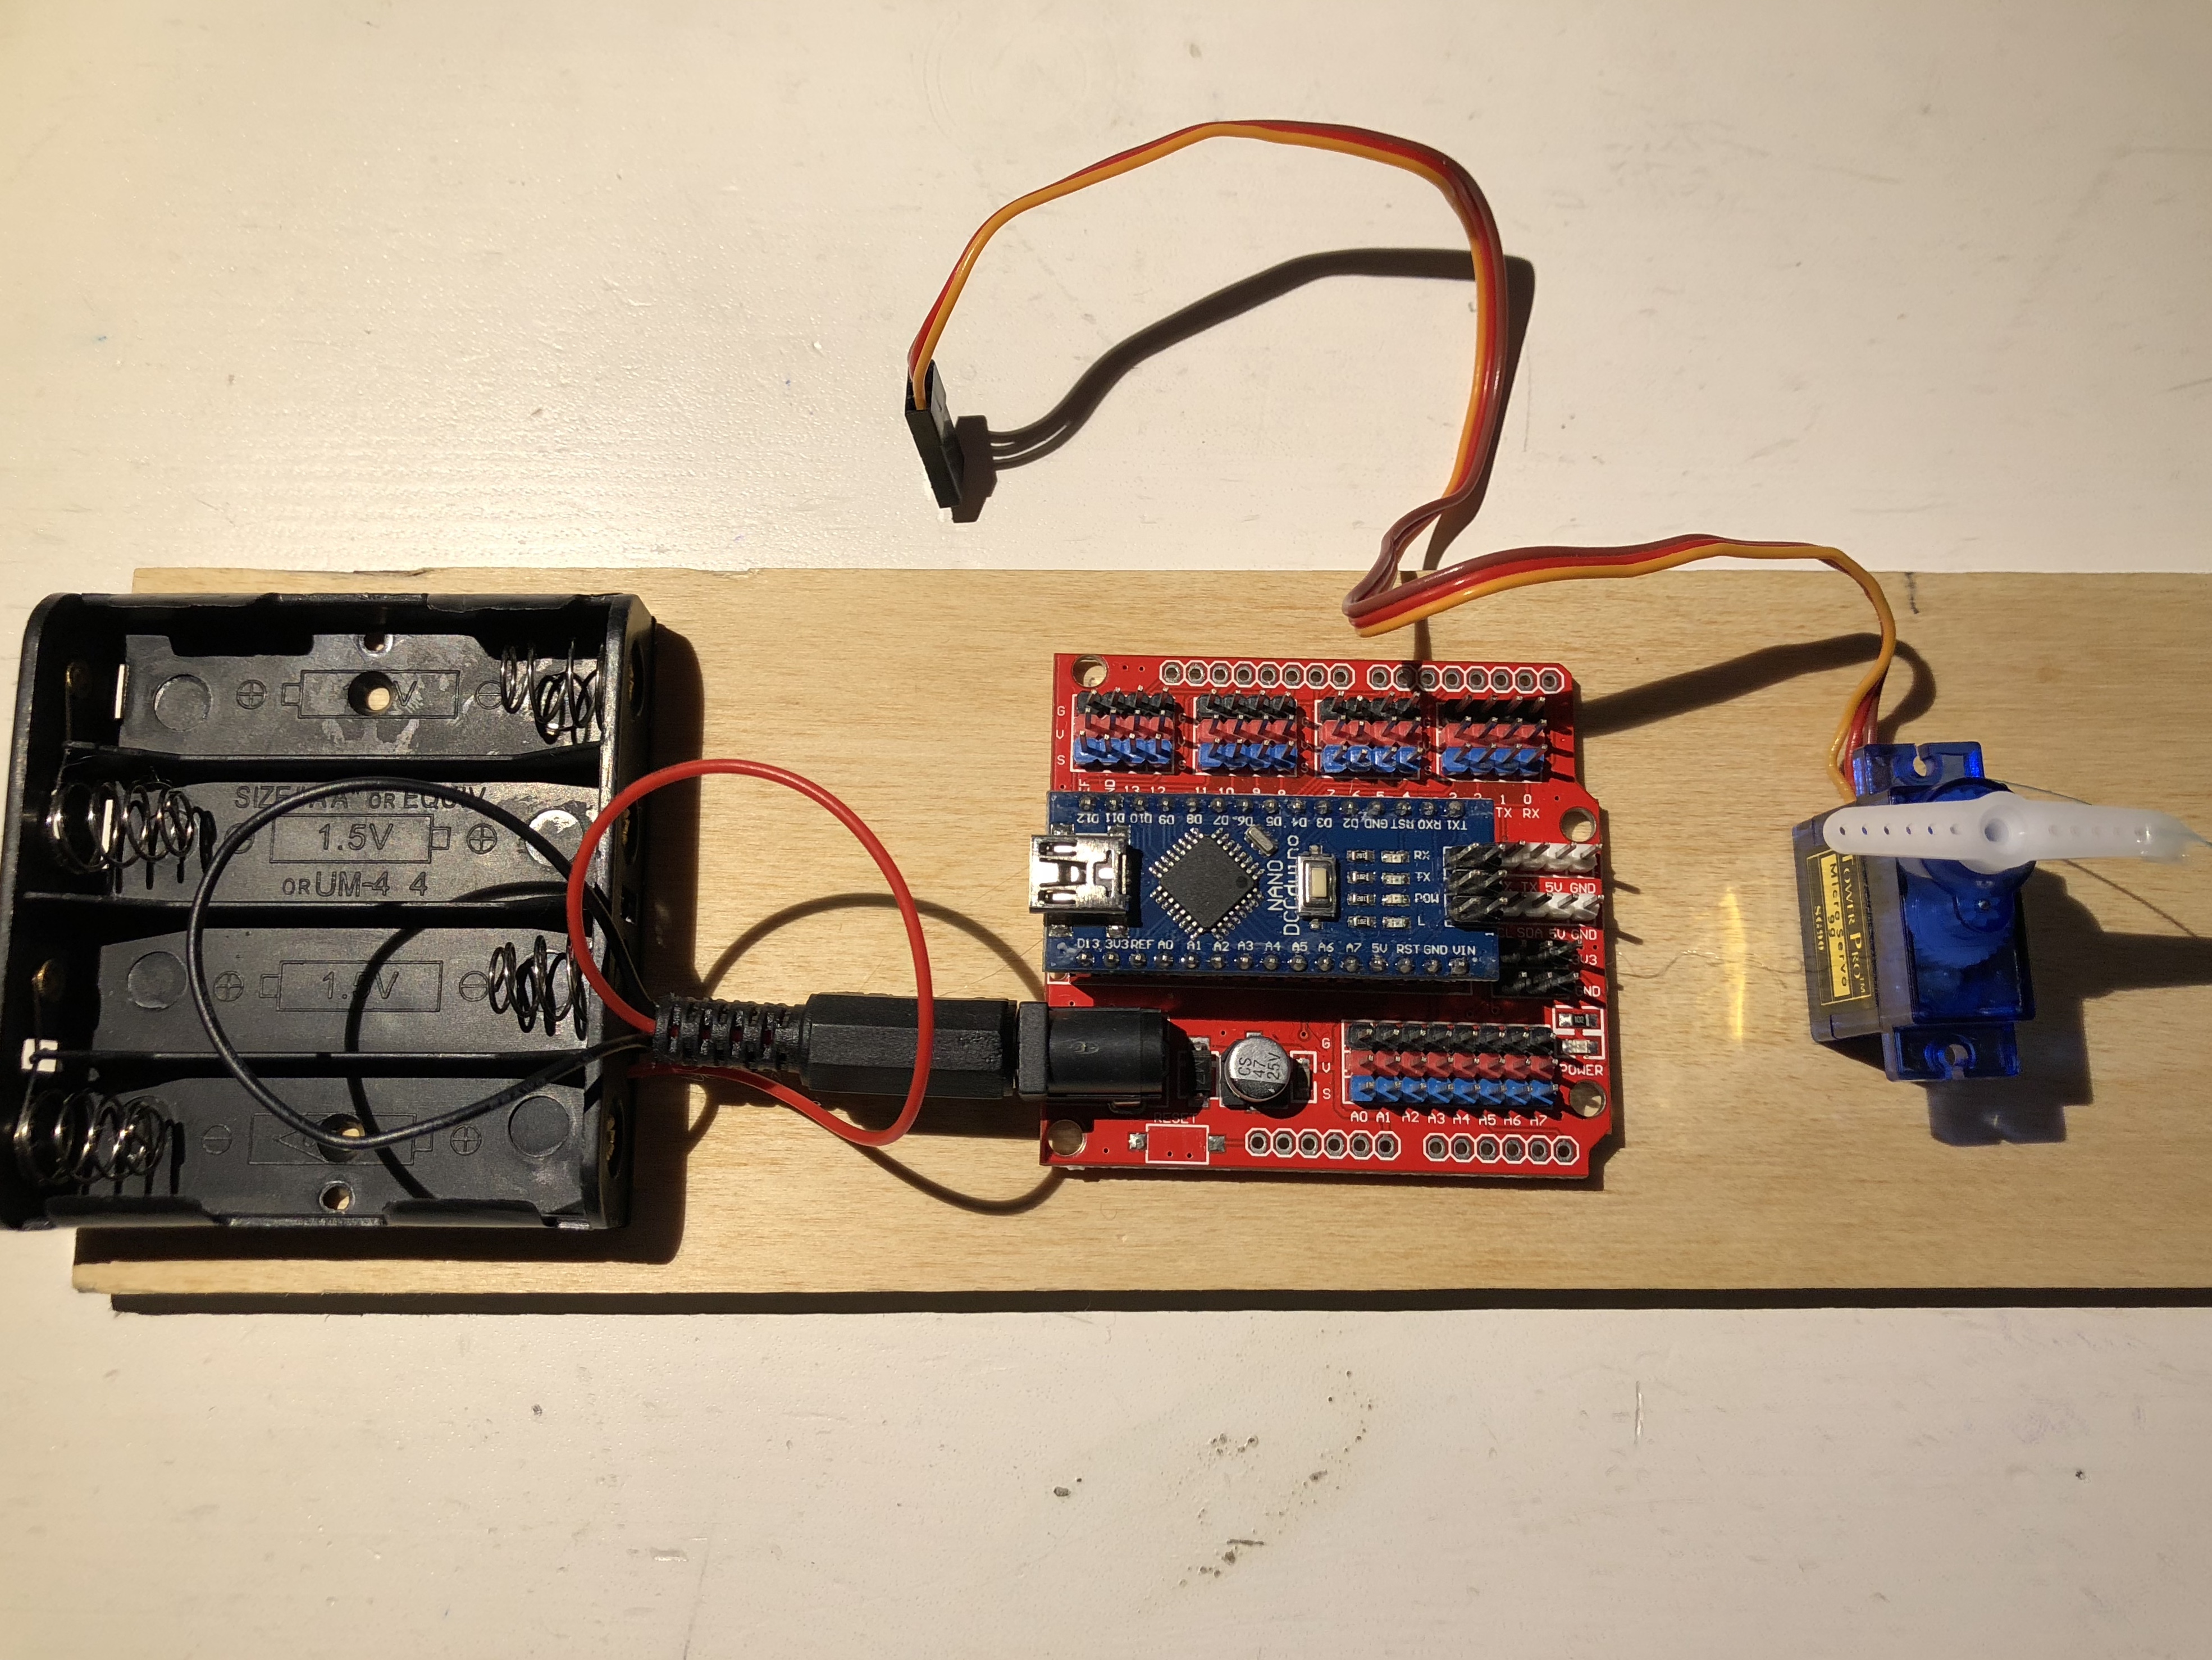
When you connect the cables make sure that you connect them to the correct pin. Check your code to see which pin the wires need to be attached to. Also remember that the brown wire goes the the GND and it is aligned with the right number.
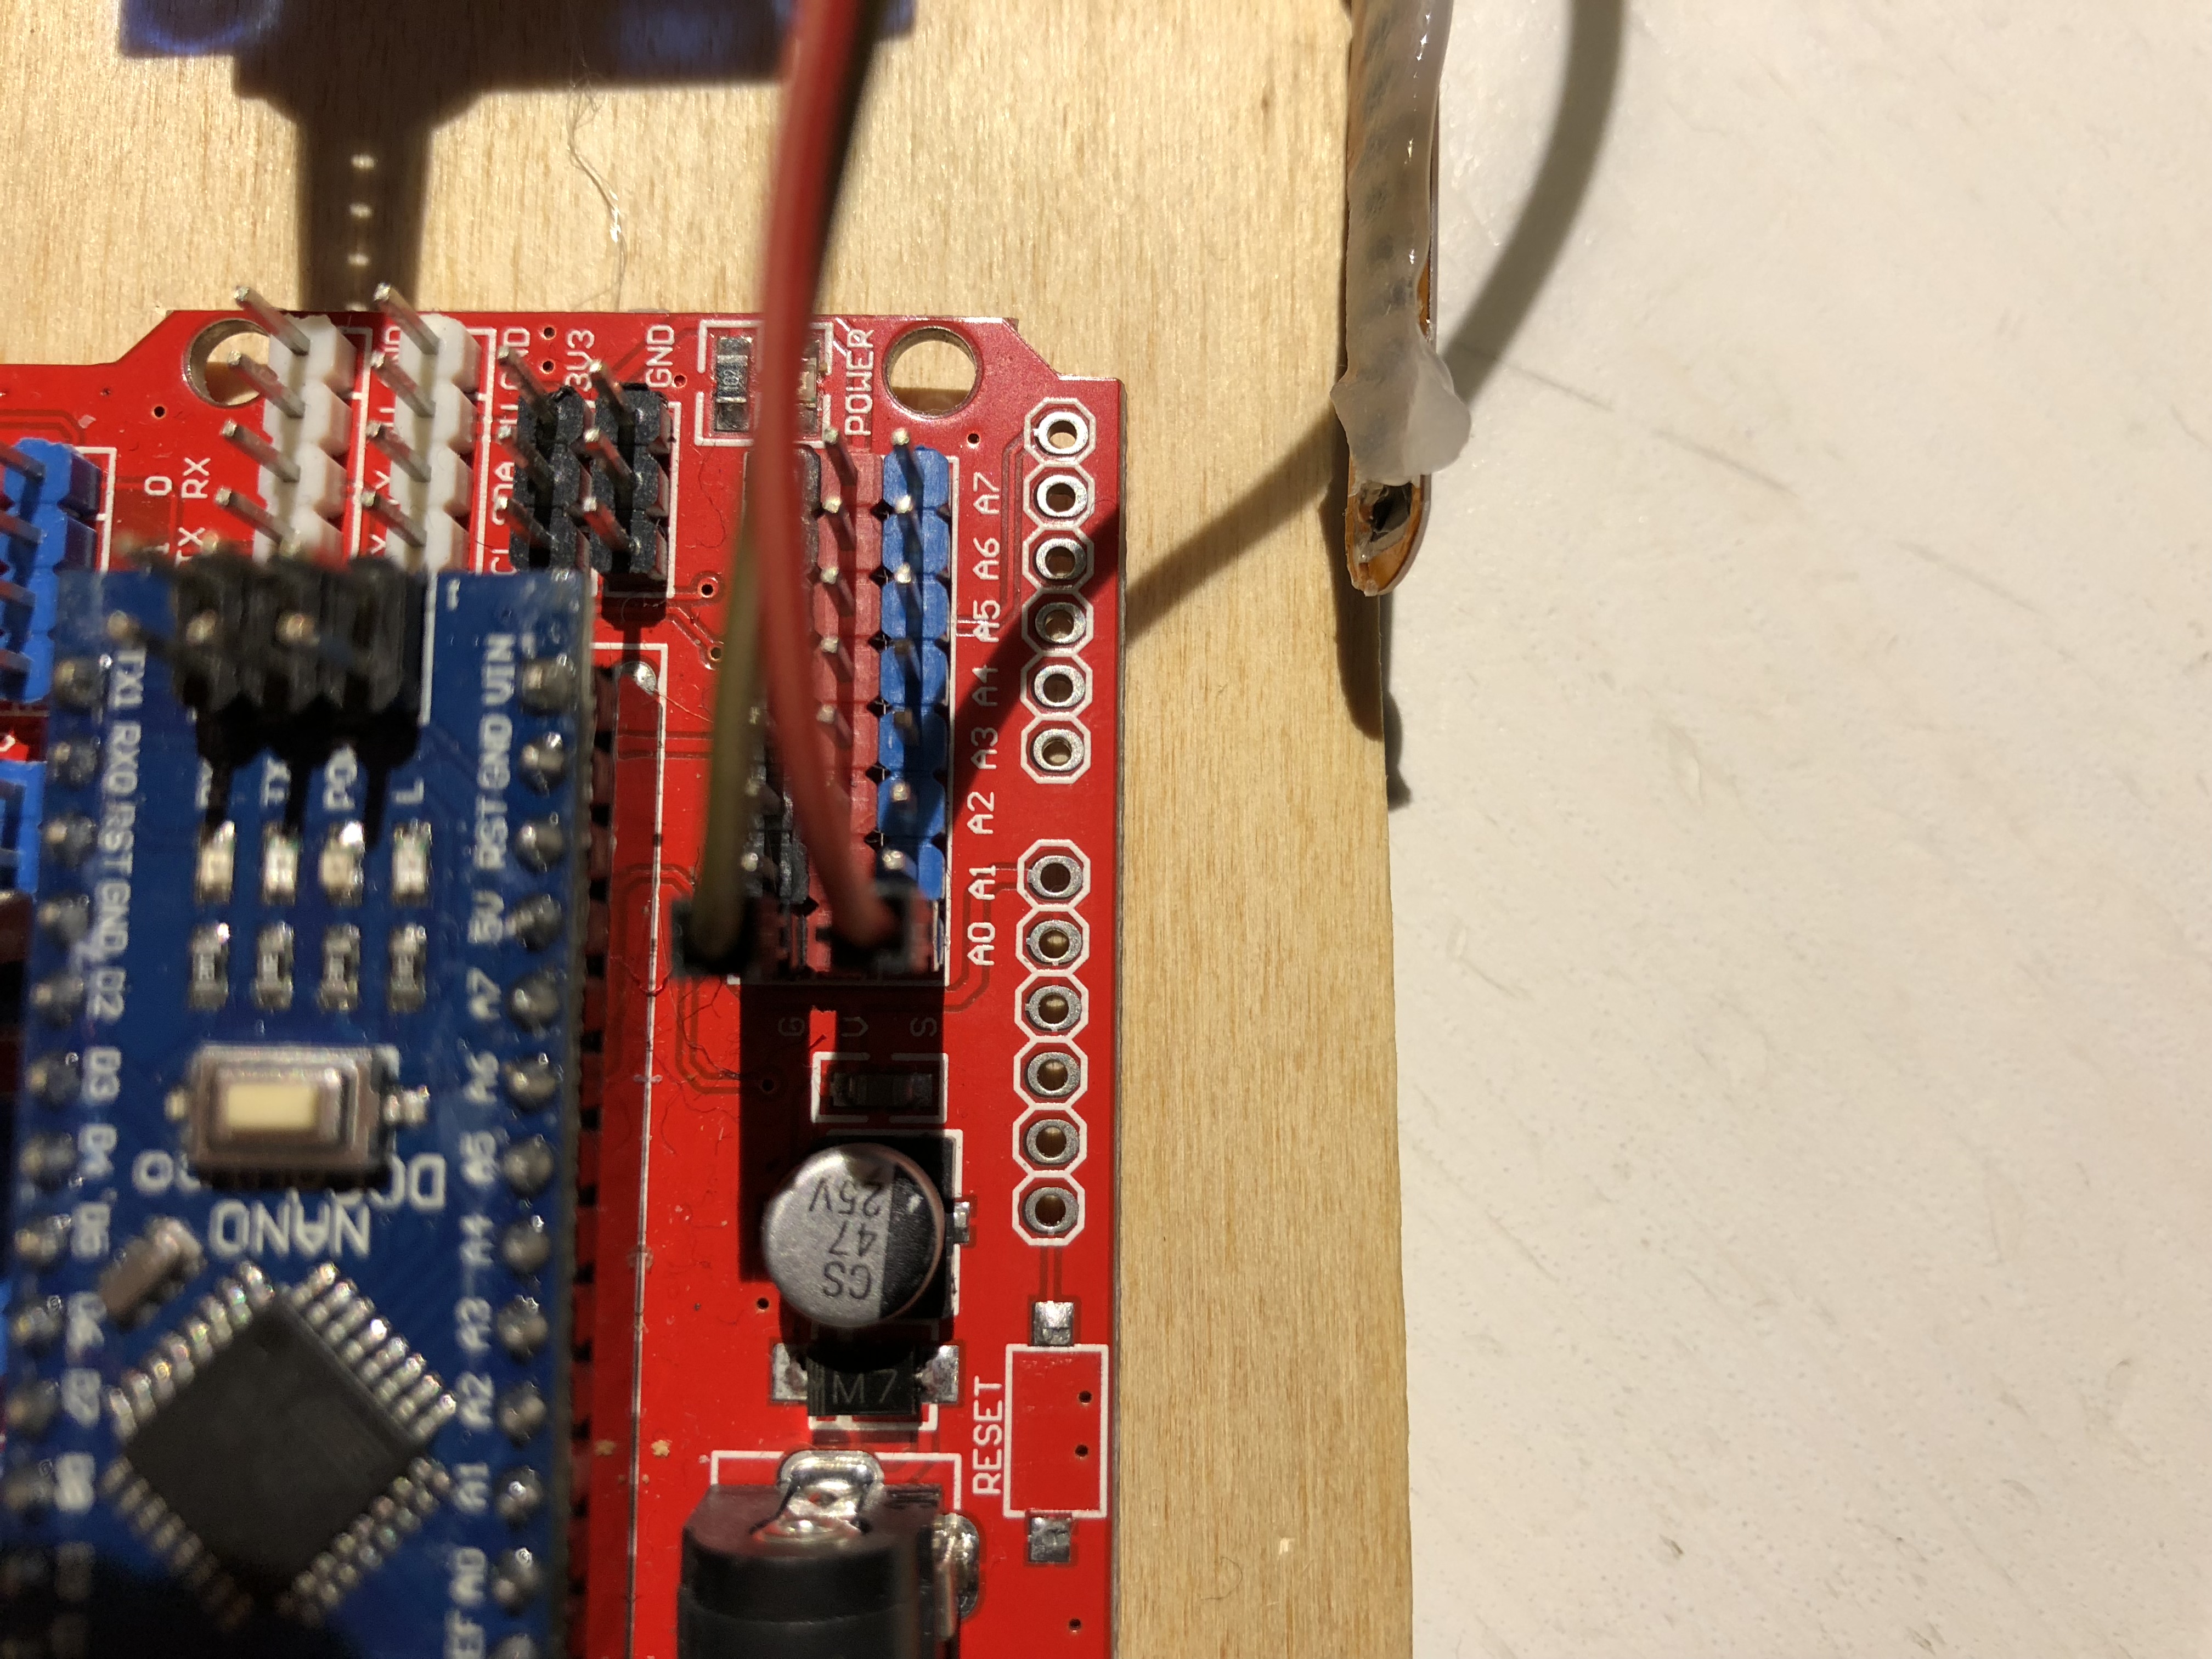
In the code, the flexi sensor is connected to pin A0. So place the wire in line with A0.

The micro servo is connected to pin 6. So place the wire in line with pin 6.
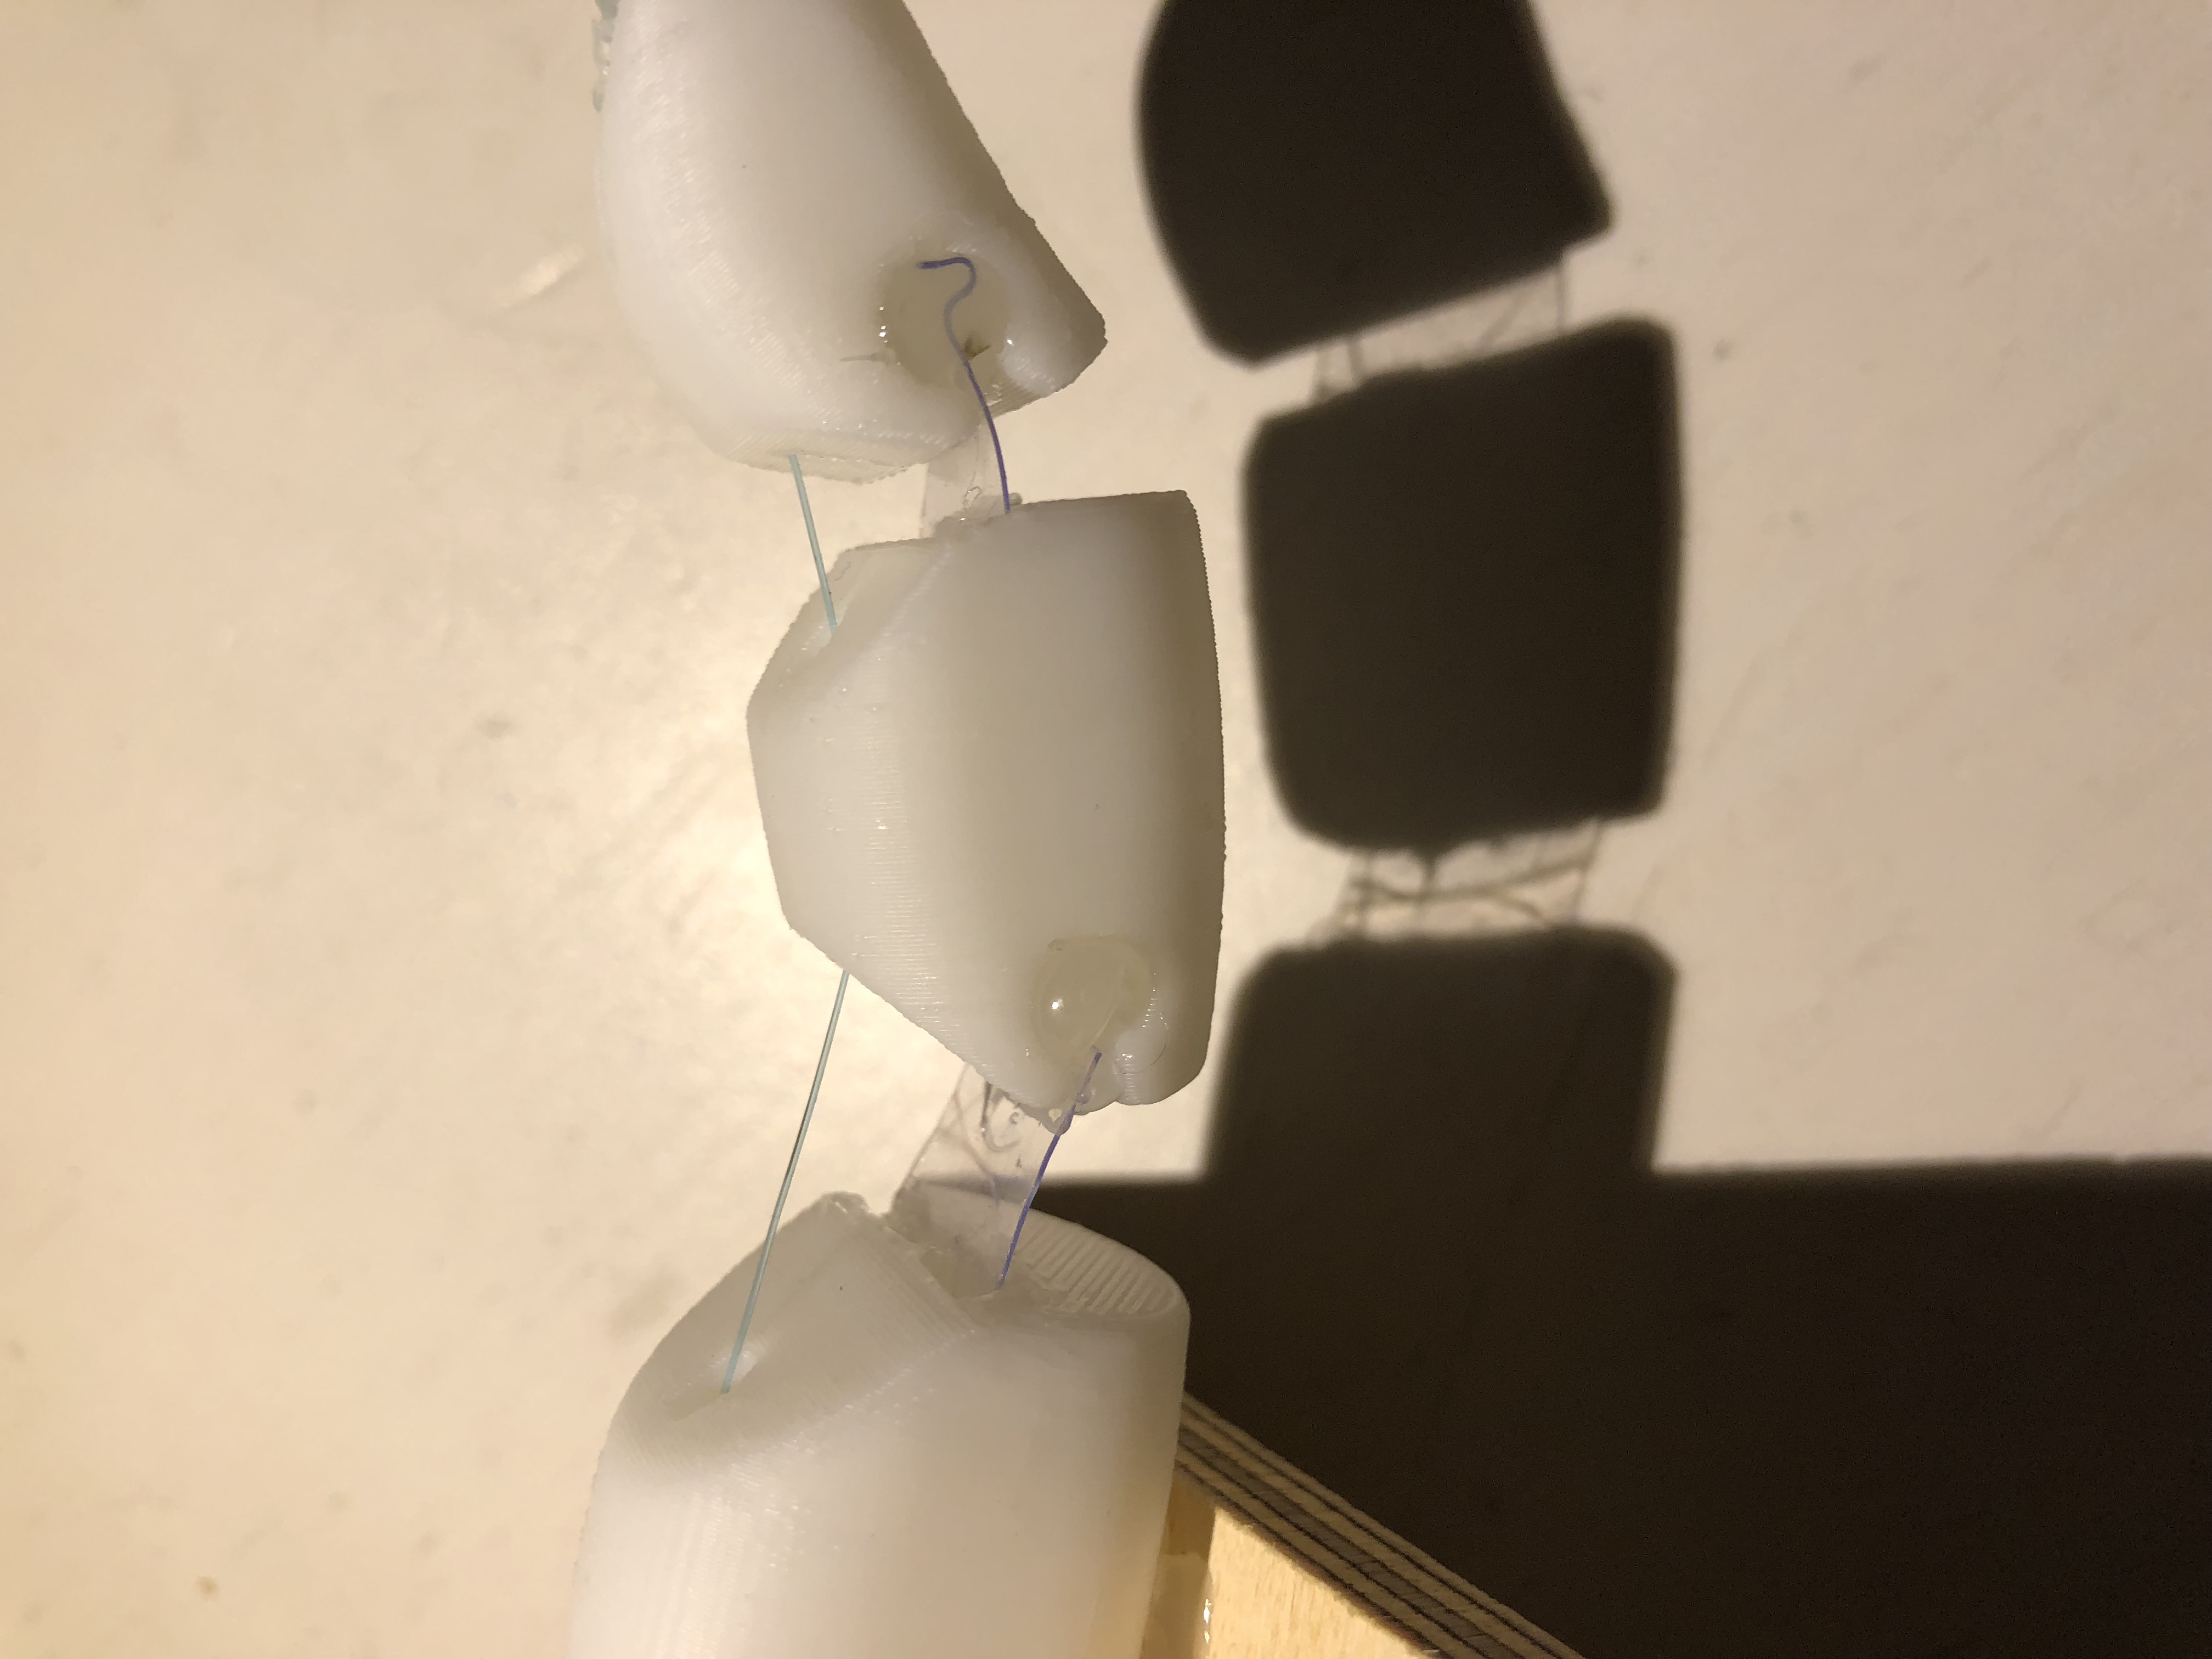
Because of the indents in the joints, cut out some plastic strips so you can glue the joints of the finger together. Try not to make them too long, otherwise they do not bend well.
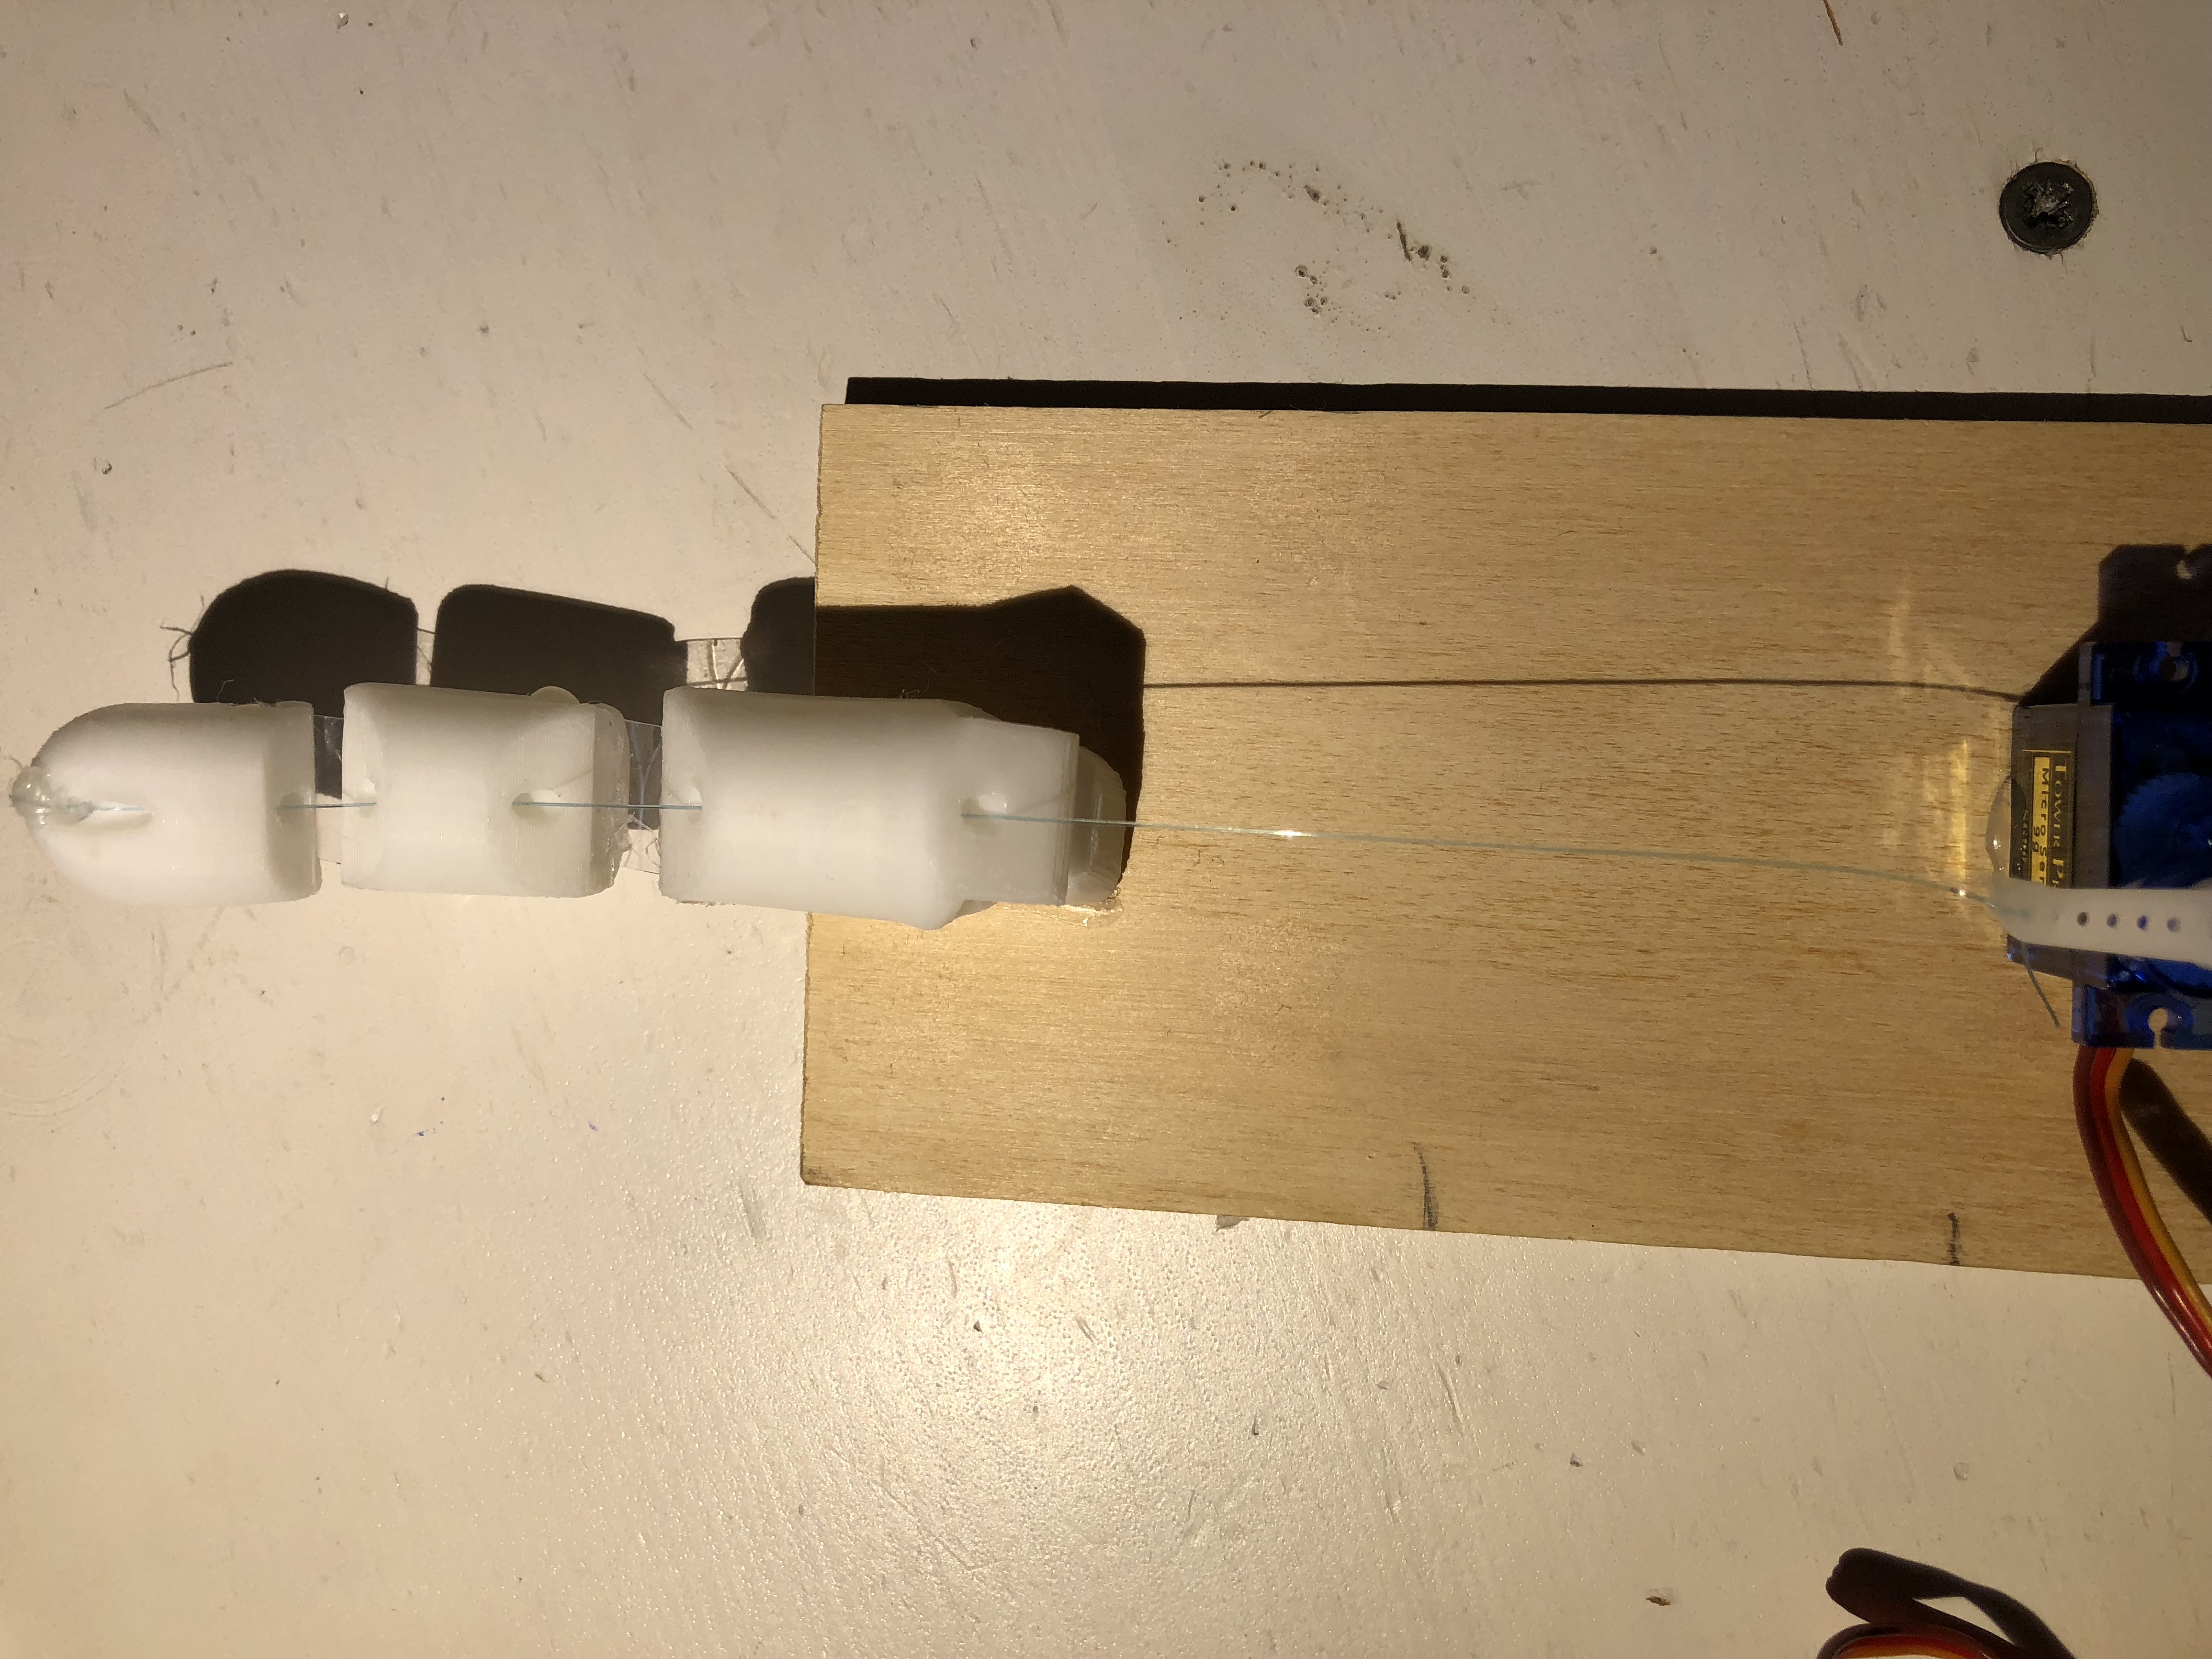
And then glue the finger to the board like so:
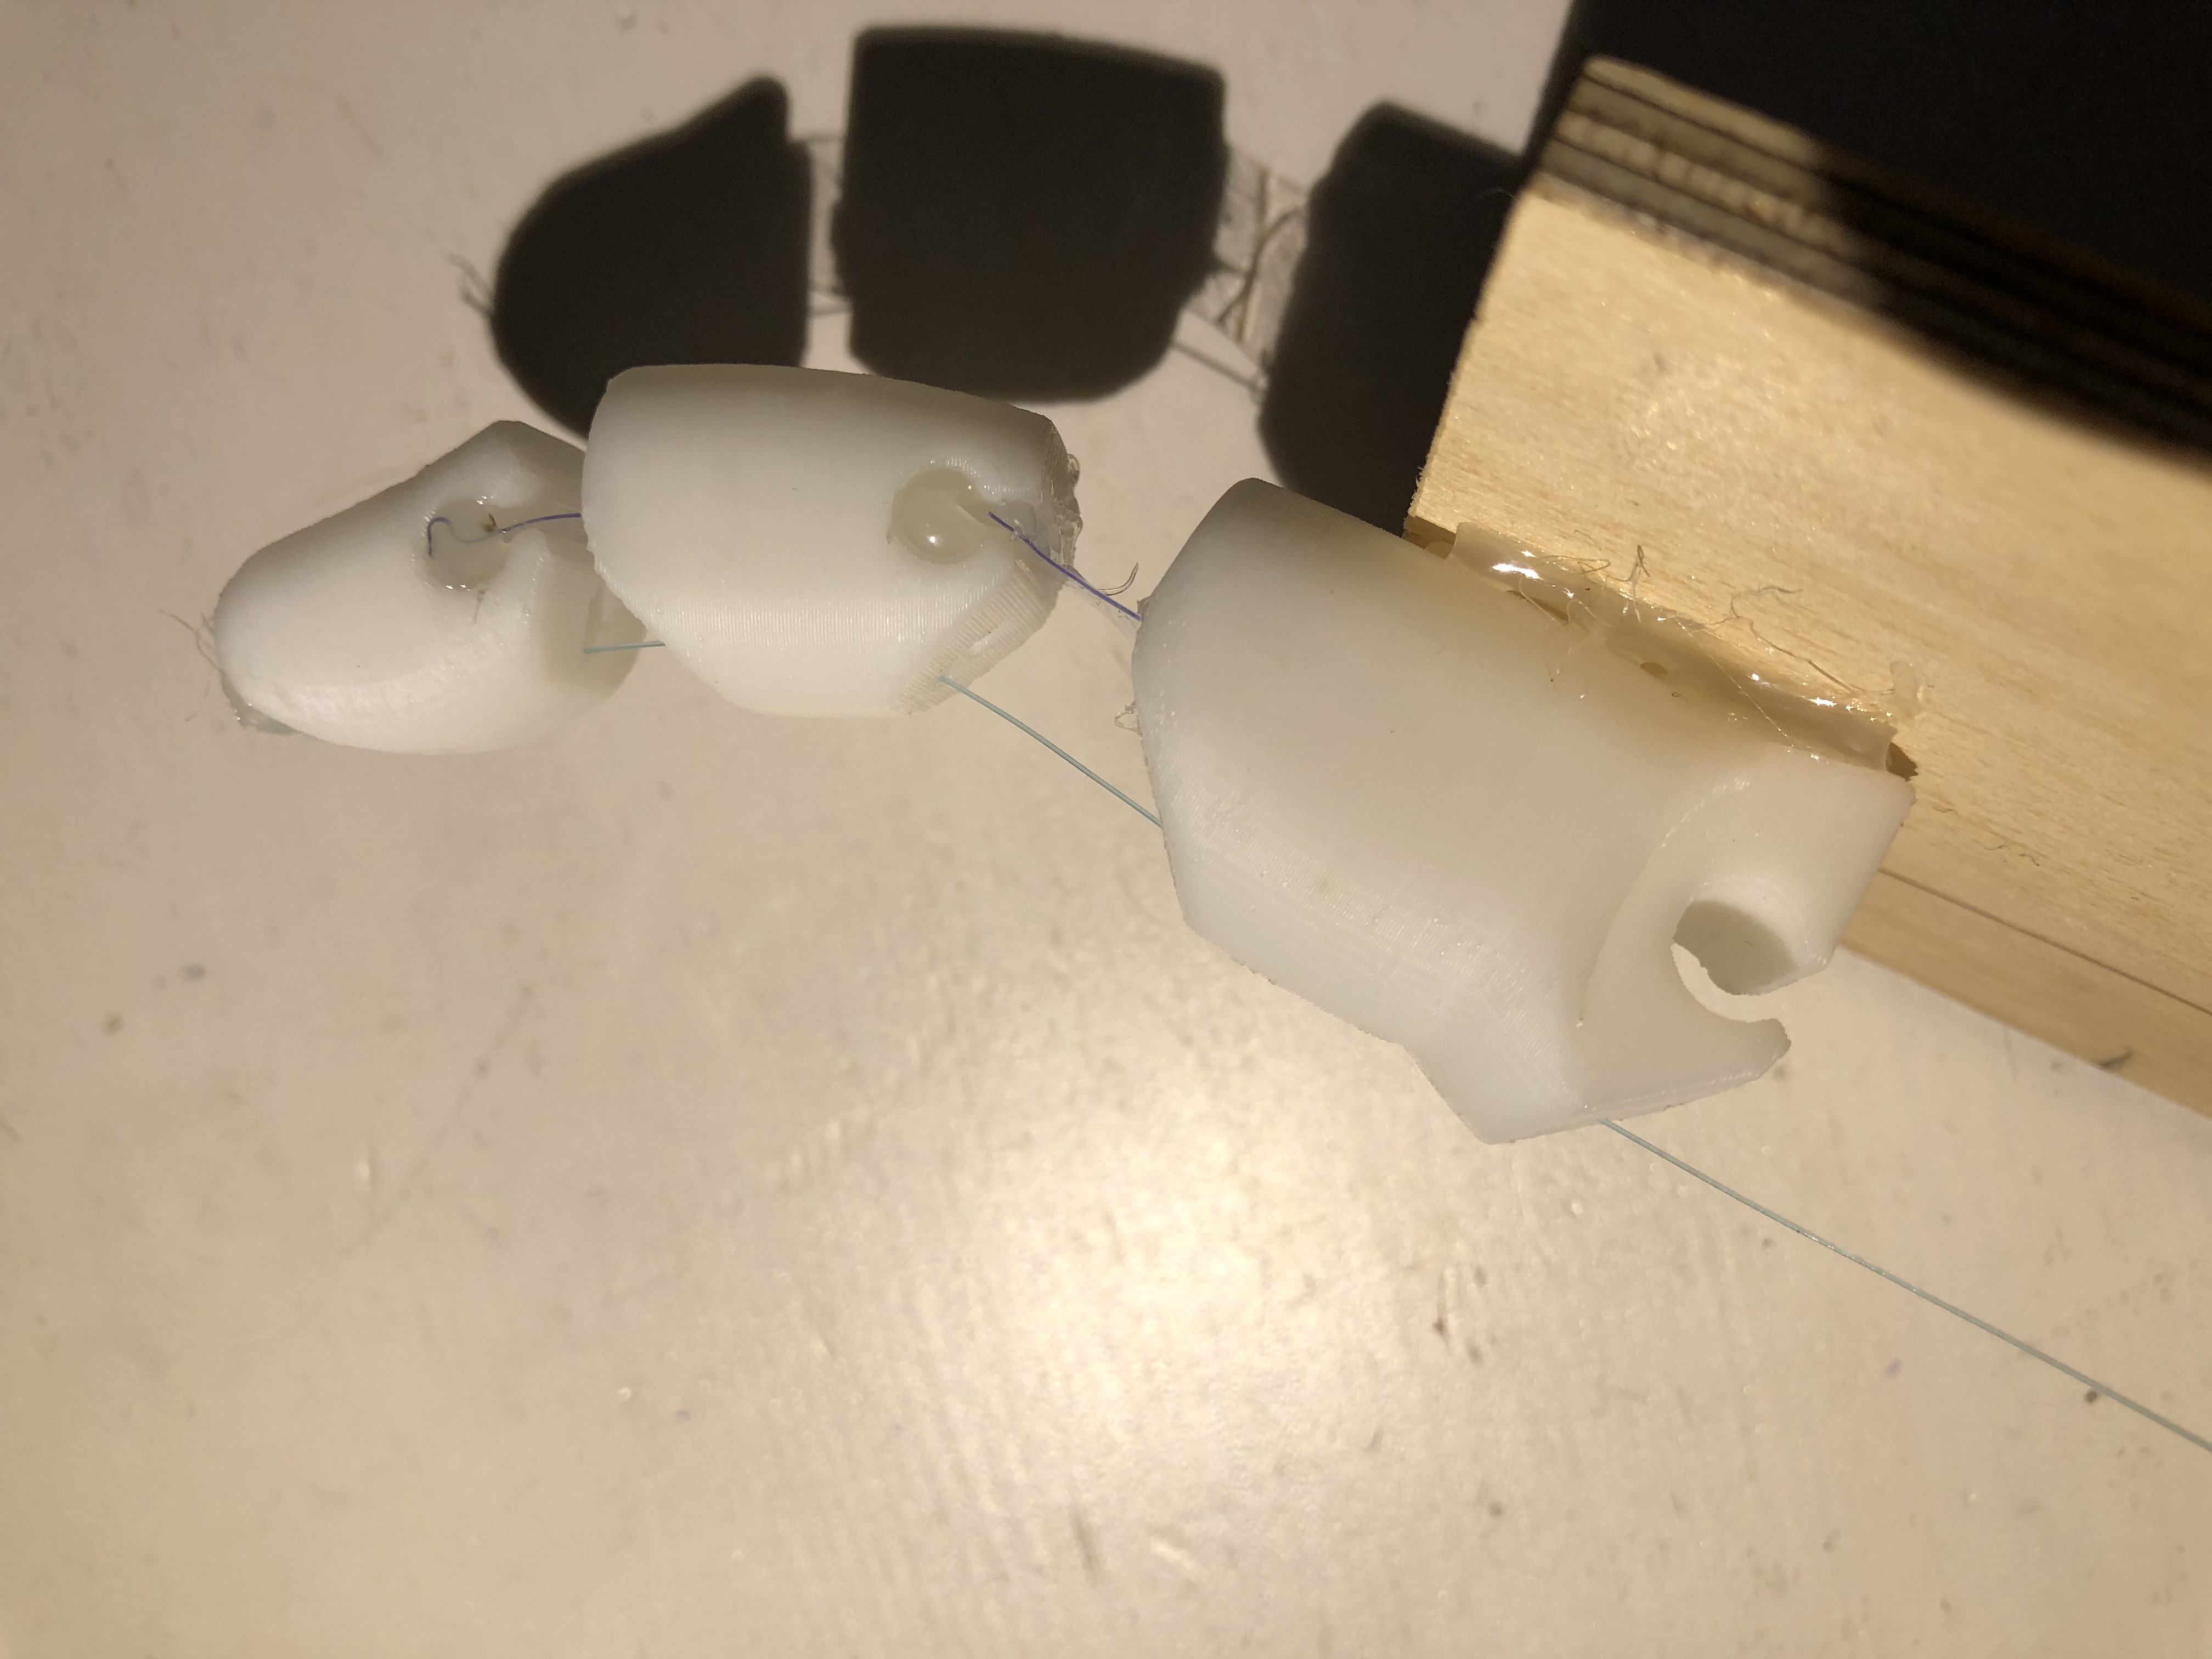
Cut fishing wire that is as long as from the tip of the finger to the micro servo. Thread it through the holes of the finger and glue at the top. Then glue the other end of the fishing wire to the top of the micro servo turning stick.
Choose what finger you want the flexi sensor to be on and glue it on. Make sure that it bends the right way (like what side the flexi sensor is glued onto the glove and what side is not), when you bend your finger.
Use the connector for the nano board, and upload your program. Put the batteries in the power pack (make sure the power pack is connected to the nano board) and see if it works! What should happen is when you bend the flexi sensor, the finger should also move.